Search This Blog

Showing posts with label brownies. Show all posts

Friday, February 18, 2011

Maple Sweetness

This dessert was so good I made it twice in two days.  Literally.


Of course I got it out of my Toll House cookbook, because that thing is the most amazing gift to bakers and stomachs everywhere.  Yum.  I wanted a dessert that was more exciting than plain chocolate, but I didn't want to avoid the ingredient altogether.  This was a perfect marriage of flavors.  To begin with you will need:


Ingredients:
1 cup flour
1/2 tsp baking powder
1/2 cup butter softened
1/2 cup firmly packed brown sugar
1 egg
1/2 cup maple syrup (or in my case, 1/2 cup 'light' maple flavored syrup.  Because it 's cheaper and has 1/3 the calories)
1 tsp vanilla
2 cups chocolate chips
1 cup chopped walnuts

I can't quite take credit for using maple flavored syrup.  The recipe in my cookbook actually calls for maple flavored syrup, not real maple syrup.  Perhaps the authors knew that no average American is going to shell out $35 for maple syrup and then pour half a cup of it in brownies.  It would probably make it taste that much better, but I was just fine with the flavored syrup.  After all, I am rather poor these days.

Directions:
Anyway, the first thing you do (after preheating the oven to 350 of course) is beat the butter in a bowl and slowly add in the sugar until it gets nice and creamy:

Now beat in the egg slowly until it's well mixed.  Slowly use the beaters to add in the maple syrup and vanilla:


Now mix in the flour and baking powder:


Beat well. 

Chop up your walnuts and try not to cut yourself like I did (don't worry, I didn't bleed into the batter or anything):


Mix 1 cup of chocolate chips and 3/4 of the walnuts into the batter and spread into a 9x9 inch square baking pan.  Frequently I read recipes that say spread batter evenly, which I don't understand.  Who would choose NOT to spread evenly?  Who would say, "You know, I think I'll spread this batter completely unevenly so it under-cooks on one side and overcooks on the other?"  So I'm not going to tell you to spread evenly.  I'm going to assume you have the wherewithal to know you should do that on your own.  And then I'm going to talk about it for an entire paragraph.


Now bake until a toothpick (or fork tip) comes out clean.  This should be about 25 minutes, though it depends how hot your oven gets.  I think it took about 30 for me, but recipes tend to make you under cook things so you don't blame them when your food burns.  You can blame me if it burns.  I can handle it.  Just don't try to feed me your burnt food.

Anyway, once it's out of the oven, spread the second cup of chocolate chips on top and let it sit for a minute or two until they're nice and shiny.  This means they're melty and you can spread them (*evenly*) over the top of the cake so you have a nice chocolate layer on top of the bars.  Now sprinkle the rest of your walnut pieces onto the melted chocolate and let it cool.  At this point it's totally edible, but you're supposed to let things cool first so you don't burn your tongue.  Silly, I know.  But theoretically practical.

Doesn't it just make your mouth water?  I had to leave it at my sister's apartment because she invited me over for dinner, so I went home and made it again so I could have leftovers to eat over the course of the week.  I'm pretty sure it was gone in four days anyway.  So. Good.


Wednesday, January 19, 2011

Honey, you're sweet!

 I think by boss is pretty awesome, and she was having a rough week.  Then I realized it was her birthday, and from experience I know that crappy birthdays suck.  Probably I don't need the experience to know that, but I have it.  And I wanted to do my best to prevent a sucky birthday.  My best being baked goods.  I decided to make brownies and decorate her desk as a surprise.  Of course I was the one who received the shock upon discovering that I had only one egg in the house.  How this happened is beyond me.  But it did.  I also did not have any of my usual egg substitutes (applesauce, tofu, flax seed, etc.).  I searched for an eggless brownie, but I didn't really like anything I found.  In the end I came up with a recipe I liked and found the whole ordeal to be a great learning experience.

First lesson: always keep more than one egg in the house.  Especially if you like to bake.
Lesson two: Two tablespoons of water and one teaspoon of oil and two teaspoons of baking powder can be substituted for an egg.  Who knew?
Lesson three: Honey is a great addition to frosting.

Let's start with the ingredients:


Ingredients:
1/2 cup butter
1 cup sugar
2 eggs
1 tsp vanilla
1/3 cup cocoa powder
1/2 cup flour
1/4 tsp salt
1/4 tsp baking powder

Frosting:
3 Tb butter
3 Tb cocoa powder
1 Tb honey
1 tsp vanilla
1 cup confectioners sugar


I listed all the ingredients you SHOULD have.  Not what I actually had.  As I explained, I had to substitute an egg.  But first, of course, I preheated the oven to 350 degrees.  Next, I poured the water into a small glass, added the oil, and then mixed in the baking powder.  It did a cool science-class-esque fizzing, and then mixed into a rather nice and gooey liquid:

Next, I melted 1/2 cup butter in a microwave safe bowl.  It's always better to melt butter on the stove top because the mixture is smoother, but I hate extra messes.  So I melted it in the bowl, and then mixed in the sugar, egg, egg substitute, and vanilla until well blended.  If you have two eggs, obviously I recommend you use both of them.  If you're allergic to eggs, this might be a great new lesson for you too.  I didn't try substituting both eggs though, so I can't make any promises that it will work perfectly.  Might be worth a shot though.

Next I measured in the cocoa, the flour, the salt, and the baking powder (I didn't include the baking powder or oil used in my egg substitute in the list of ingredients, so either way you should now add 1/4 tsp baking powder to your batter).


Spread batter into an 8x8 inch greased baking pan and place in the oven for 25-30 minutes. 

Don't over cook, especially if you like super gooey brownies.


 When I got to the frosting, I realized that I didn't have any more cocoa powder.  This was clearly not my day for baking.  But I had a birthday to celebrate and no time for the store.  I just decided to melt some chocolate I had on hand instead.  I melted about 3 tablespoons of chocolate chips over the stove and then removed the chocolate from the heat.  I dropped in the butter:


and then added the honey and vanilla.  Using beaters I mixed t together until well combined and then slowly added confectioners sugar until I got a consistency I liked:


I know that using chocolate chips instead of cocoa powder meant the frosting might be too sweet, but it didn't really bother me.  And in a pinch, it got me what I wanted (i.e. a chocolate frosting)  The original recipe recommends you frost while the brownies are still warm.  I tried this and it didn't entirely work.  I recommend waiting for at least an hour before frosting the brownies.  Then let the frosting set for a bit before serving.  I brought them to work the next day and they were gone by noon.  Most importantly, my boss went home happy.  And as far as I'm concerned, that's what spells success.

Saturday, November 27, 2010

A Martha Pumpkin Swirl

So I've never really been a follower of Martha Stuart, but after my little adventure I might have to reconsider my feelings towards her.  I love pumpkin, I love chocolate, and I love recipes that require more than two bowls.  Not that I love washing them, but I derive a certain pleasure from the process of baking and if there's something that will prolong that process and improve the taste, I'm in favor of trying it.  So when I found a Martha Stuart Pumpkin Chocolate Brownie Swirl recipe, I figured I'd give it a go.

The list of ingredients is not quite daunting, though it is a bit longer than most brownie recipes.  After having made it, I'd probably make a few changes to the recipe.  I found it on the Smitten Kitchen blog (here's the direct link) but the following is my own slightly altered version.  I'm including alterations I'd make if I were to do it again.  If you try it and it doesn't work, feel free to blame it on me.  There are plenty of other things to blame failure on though, so I encourage you to try the blame on them first, but I guess I'm a good third or fourth scapegoat.  

Anyway, here's the ingredient list if you're making it in a 9x13 inch baking pan.  Also, I would say this is more of a cake than a brownie, despite what Martha and Smitten seem to think.  We clearly have differing opinions of what constitutes a brownie.  

Ingredients:
1 cup butter or margarine (for those of you afraid of cholesterol or dairy)
12 oz (1 regular size bag) semisweet chocolate chips
3 1/4 cup flour
2 tsp baking powder
1/4 tsp cayenne pepper
1/2 tsp salt
2 1/4 cup sugar
6 eggs plus 2 egg whites (or 8 eggs if you can stomach cracking that many eggs into one dessert)
2 Tb vanilla extract
2 1/2 cups pumpkin puree (about 1 1/2 cans)
1/2 cup vegetable oil
2 tsp cinnamon
1 tsp ground nutmeg
1 cup chocolate chips (extra for mixing in, not to be confused with what you're melting)
1/2 cup chopped pecans


First preheat the oven to 350 degrees.  I forgot to do this until halfway through which was fine, because this recipe takes a while to make and our oven heats up fast.  But all recipes start with preheating the oven, so there's no real reason to do this one any differently.

Next mix together in a bowl the eggs, vanilla extract and sugar beating until you get a pretty foamy layer on top.  Five minutes with electric beaters, or three if you're impatient like myself.  It should look something like this:

Now go get a pan (don't try it in the microwave, you are likely to burn the chocolate, trust me I've done it enough times) and melt the butter and chocolate over the stove until smooth.  It should look something like Willy Wonka's chocolate river.  Or the picture below:


Now mix the flour, baking powder, cayenne pepper, and salt together in a bowl.  I hate doing this and usually just add all the dry ingredients into the wet at once.  But you're going to need the second bowl later anyway, so with this recipe you might as well.

Good, now you're going to beat the flour mixture into the egg mixture in batches until it's all nicely combined like this:

Doesn't that just make you want to start baking this recipe immediately?  It just looks so darn tasty.  God, I'm starting to want to make it all over again just posting these pictures.  But I guess I should finish my post first.

So now you're going to split this batter between your two bowls (see, I wasn't lying when I said you'd need it anyway).  I didn't read the whole recipe before I started to make it and at this point realized I should have just mixed the dry ingredients together in the second bowl to begin with.  Ah well, live and learn.

Now that you've split the batter, you're going to pour the chocolate mixture into one of the bowls and beat it in with the batter.  You will likely begin to drool at this point, so I suggest wearing a face mask.  Learning to shut your mouth when cooking might also work, but I have yet to master that technique.  Now try not to drool on your laptop, but this is what it should look like:

Great, so now you're going to add the pumpkin, oil, cinnamon, and nutmeg to the other bowl of batter and beat it all together.  Side by side it looks like these lovely ladies:

Now I think things could always use chocolate chips, so I would recommend adding a cup of chocolate chips to the chocolate bowl.  You could really put them in either, but the chocolate chips might dim the orange/brown contrast of batters if there's already brown in the orange batter.  I think I might have made that sentence unnecessarily complicated.  I'm going to assume you're smart enough to piece out my meaning.

Now you're going to grease a 9x13 pan and pour half the chocolate batter into the bottom of the pan.  Top it with half the pumpkin batter.  It looks like this:


Spread it evenly across the chocolate bottom, and then put down another chocolate layer and a final pumpkin layer.  Using a knife, swirl it around until you get the marbling effect you wanted:

Sprinkle the pecans on top and bake for about an hour, but check on it at 45 minutes in case your oven is much faster than mine.  When it's done it will look like this:

And it will taste like this:

YUM!!!
Actually, I thought it was just ok but everyone else seemed to love it and it was gone by the end of Saturday afternoon so I guess something went right.  Perhaps it's because I have a different expectation of brownies.  I want them to be moist and not at all spongy, so this was a bit too cake-like for me.  But With my suggested alterations (more sugar, less flour, added chocolate chips) I think it will be a bit more brownie-esque.  But really, I like pleasing others with my food just as much as I like pleasing myself, so in that regard it really was a success.  

In other exciting news, my sister just bought me a new copy of my favorite dessert cookbook (I long ago wore my last copy to pieces) so when I return to DC I will attempt to bake everything from the book I haven't tried before.  There isn't much, but I'm giving it all a shot.  That means you have some donuts and several candies coming at you in the next few weeks.  Get excited!  I certainly am.


Thursday, November 11, 2010

The Peanut Butter Experiment

Chocolate Peanut Butter Brownies

I follow recipes.  I do not make things up when I am baking because so much depends on ratios and if you mess it up a little you might end up with a bad batch of brownies.  And that just seems like a waste of perfectly good ingredients.  So what happened tonight was out of necessity. Kind of.

I got home around 10 and started thinking about the dessert I have to make for a meat meal this Friday night at a friend's place.  She doesn't like for anyone to use margarine (actually, I don't really like using it all that much either) so I wanted a chocolate recipe for brownies that didn't call for butter or margarine.  I couldn't find one I liked online so I modified a cake recipe I've been making for years.  It uses oil instead of margarine or butter, which may not be much better than margarine, but for the moment I'll pretend.

Anyway, I wanted something with peanut butter, so I found some recipes online, mixed them in with the one I already had, and came out with a batch of brownies that (though I have yet to taste them) look pretty killer.

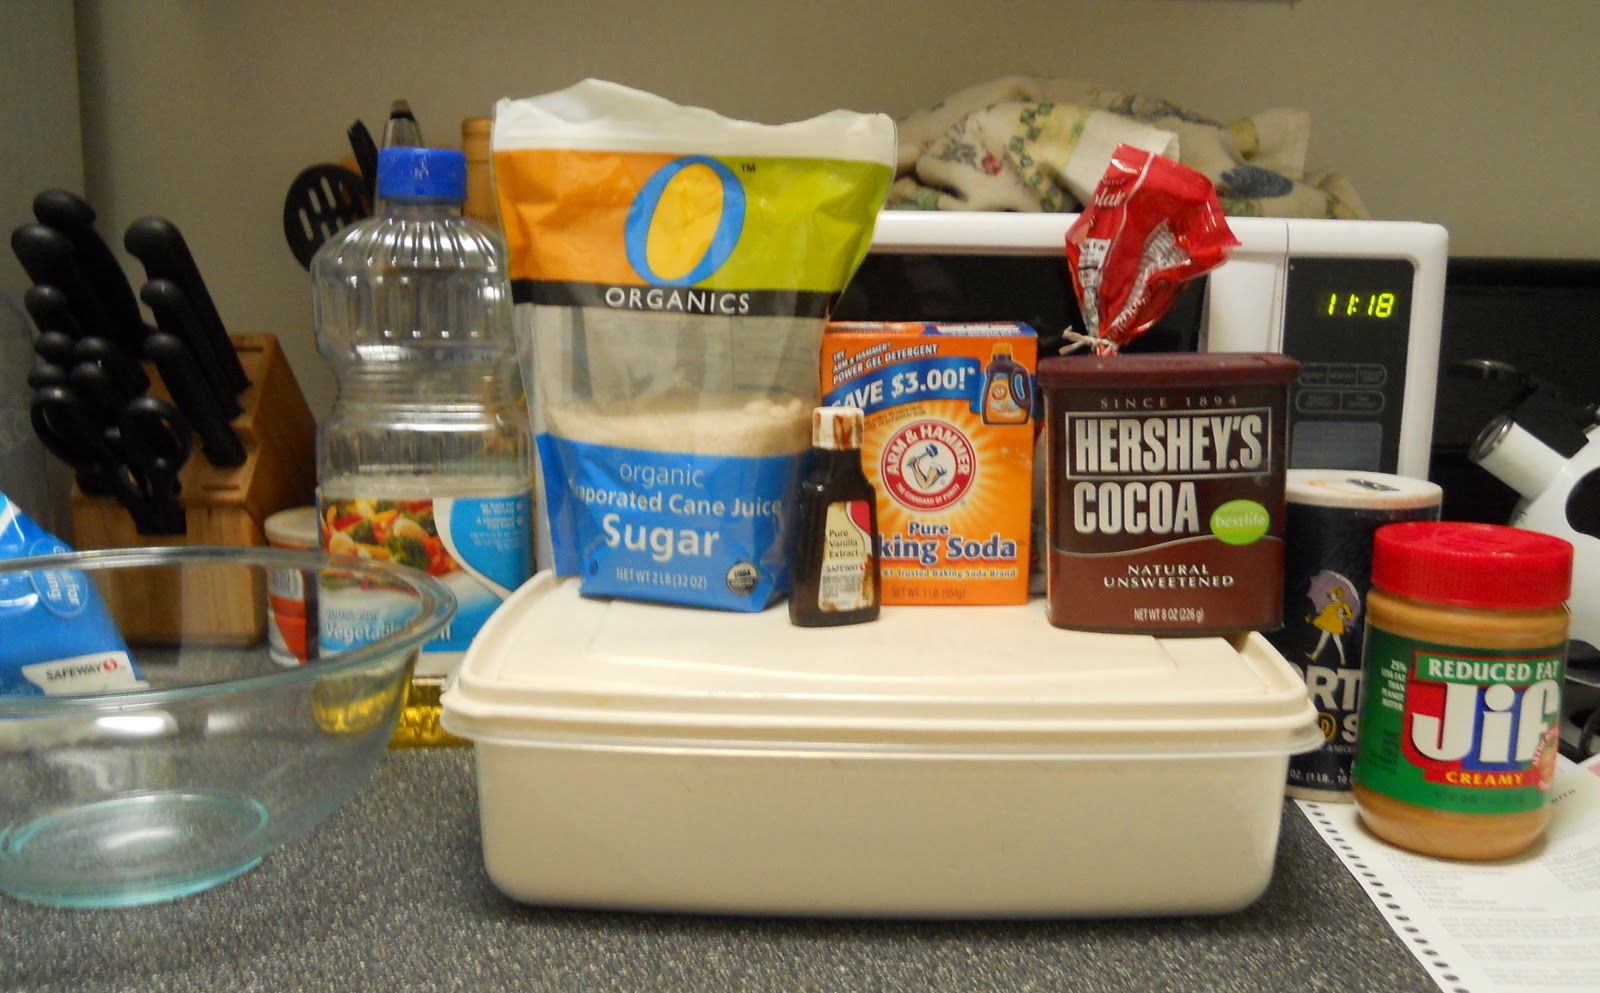
The ingredients are basic enough:
2 1/4 cups flour
1 cup sugar
1/4 cup cocoa powder
1 tsp baking soda
1 tsp salt
1 cup cold water
1/2 cup vegetable oil (or you can do 1/4 cup applesauce and 1/4 cup oil if you want to be healthier about it)
1/2 tbsp vanilla
1/2 cup peanut butter
1 cup chocolate chips


First turn the oven up to 350 degrees.  Then get out your handy dandy mixing bowl.  Technically you're supposed to mix the dry ingredients together and get out all the lumps, then separately mix the wet ingredients, and then pour the dry into the wet.  I know this will make a better, smoother cake but I hate having to wash the extra bowl so I just mix the wet ingredients:


and then add in all the dry ingredients at once.  As you're mixing the flour into the batter, put the peanut butter in the microwave for about 40 seconds until it's kind of soft and gooey.  I just microwave it in the glass measuring cup to save myself more dishes, but you can try microwaving it in the plastic container.  This might give you some disease down the road or just melt the plastic, but it might not.  Wow, this is like choose your own adventure baking!  Anyway, now you can pour half of the melted peanut butter in with the batter and mix it all up.  I guess this isn't necessary, but I figured the more peanut butter in the batter the better.

Now you can get out a round baking dish (or a square one, I won't be shape-ist) and oil/spray/butter it up.  Pour 3/4 of the chocolate batter into the dish, sprinkle the chocolate chips on top, and then dot the top of the batter with the melted peanut butter.  By which I mean take dollops (I really enjoy saying that word) of peanut butter and drop them across the top of the batter.  I got too excited about this to stop and take pictures, which would probably have been helpful for you.  Sucks to be you!  Haha, just kidding.  But back to the recipe...drop dollops (extra points for two usages in one post!) of the chocolate batter on top of the peanut butter and swirl it all around with a kitchen utensil.  I used a spoon.  I'm sure a steak knife or the tip of a ladle would work just as well. 

So anyway, now you put it in the oven and let it bake for 30 minutes.  If you're like me and enjoy the salmonellic thrill of undercooked brownies, take it out when it's still a little gooey in the center and (once it has cooled a bit) place it in the freezer.  It will now be delicious perfection.  Frozen brownie batter is what made Ben and Jerry famous after all.  Well, one of the reasons.

And now you have a great, dairy-free, margarine-free, peanut butter and chocolate dessert that everyone will love.  If they don't love it, they're probably crazy and aren't worthy of conversation anyway.  Not to be judgmental or anything, but I do have standards.

I'll re-post a warning if I bite into this and discover it's all bark and no bite.  I'm not really worried though.